Friday, January 24, 2014

Textured Ponytail

We would like to begin this post by inviting you to contact us to get your hair colored/styled or makeup done! Email us at liljenquistangela@gmail.com to schedule an appointment. We are located in the greater Salt Lake City, Utah area and would love to meet you and make you pretty again!

Now for the post!  This is for all of you that want to spice up your everyday ponytail.


Begin by teasing the hair in the crown area. 


Take 3 sections from the corner of the head.  You can begin closer to the ear, but we chose not to.


Start a French braid by picking up sections from only the bottom (under the braid).


Continue braiding, while pulling the hair toward the left side. Make sure you are only using hair from the front right side (not the top!).


Finish the braid and use bobby pins to hold the ends.


On the left side, pin hair loosely as shown.  


We had fun with the bobby pins and made them visible, creating a triangle. Be creative here!


Pull all of the hair to the left side and secure it with an elastic.


Take a section of hair from underneath the pony and wrap it around to hide the elastic. Pin to secure.


Go through the braid and pull the sections to give it added texture and look more undone!


We finished with hairspray and shine spray, using Big, Sexy Hairspray and Moroccan Oil Shine Spray.


This look is perfect for work or a week night!


Let us know how the textured pony works for you!

Tuesday, January 21, 2014

Dramatic Wing

Today's look is perfect for any of you that like to vamp up your look! A Dramatic Wing is a sexy yet easy way to maximize drama on the face. Angela used two products for this look on Marianne, L'Oreal Liner (in a pot) and a small paint brush - a total of only $ 12.00. 

Get ready for some serious VAMP as we walk you through 4 easy steps of the Dramatic Wing!
  

Begin with your face prepped as usual. If you are going to wear eye-shadow, you should also apply that during this step. Marianne is only wearing foundation and mascara: 
 
Next, get your favorite cream eyeliner. We love cream eyeliner because it's extremely versatile (we also like liquid liner, but cream gives a softer look). We have tried everything from MAC's Fluidline to the dollar store brands and this is our very favorite: L'Oreal Lacquer Liner in Blackest Black.

To save money, we use a paint brush found at JoAnn. They are cheap, durable and come in all different shapes and sizes. Simply dip your brush in the cream liner, beginning with a moderate amount of product on the brush and draw!  Remember, you can always add more! 
Start in the inner corner of the eye and drag the brush outward along the lash line. The more pressure you apply with the brush, the thicker the line will be. Get a solid base, then go over it a few times. 
And now, for the wing!
Draw a thin line extending from the end of your lash line toward your temple.  Angle the line toward the end of your eyebrow.  To complete the shape of the wing, draw another line from the tip of the wing in to connect with the outter corner of your eye.
Fill in the open space with more liner.  You can see that we brought the line slightly underneath Marianne's eye, this makes the wing look more natural. 

Once you have your basic wing shape, you can build on it to make it thicker, darker and more dramatic!
We thickened and darkened Marianne's look for fun!

We brought the eyeliner under her bottom lashes, making her eyes pop even more. Have fun with this!

To complete the look, add a little blush and highlighter to the cheeks and cheekbones. We used Buxom Blush in Shangri-La-La and Benefit Watt's Up! highlighter.


Simple and Dramatic!


Monday, January 13, 2014

Let's Get Pretty Again - Holiday Party 2013

Happy New Year! For us, 2014 is already bustling with the realities of school, work and winter.  But before we say our final goodbyes to 2013, we want to reminisce on the beautiful holiday season we experienced.  One of the highlights was decorating a company holiday party at the Gallivan Center in Salt Lake City, Utah.  It turned out beautifully!  

The decorating team included the two of us (Angela and Marianne) and our fabulous mom, Shelley.  Shelley has the vision, and we just help her make it become a reality ;) She also knows how to do ANYTHING on a very small budget.

We chose a "Winter Wonderland" theme, using blue, white and silver decor and aimed for a formal look (so this could also work for a wedding). Due to the building regulations, we only had four hours to decorate, so not everything we had planned was used, but it still looked marvelous.

Everything we used was purchased from Wal Mart, (aside from the table stands) keeping it very budget-friendly. Thanks to Diamond Rental for the tables, chairs and linens and to Culinary Crafts in Salt Lake City, Utah for the wonderful catering and table settings. Also a big Thank You to Cat Palmer Photography for the fabulous photos!!

For the Welcome table, Shelley made a few different arrangements that we put together using ornament balls, glass vases, tree branches, salt (to look like snow), feathers, and candles. It was perfect!


The cabaret tables - We used these for cocktail hour, appetizers and desserts.  We purchased these silver picks from Wal Mart for $3.95 a piece, added four ornament balls (also from Wal Mart), and feathers at the base... So simple yet so beautiful. We used a powder blue table cloth that was tied with a sparkly white ribbon half way down (you can see what I mean in the first picture).


Here are the Table Centerpieces.  We used a large silver stand, purchased from Tai Pan Trading, and put a small glass vase on top, again filling it with ornament balls, other picks and intertwined ribbon through it. We then hung crystals from the stand as shown below.  So simple yet so stunning.


Something fun and different we did (we actually got the idea from Pinterest!) was cut out snowflakes and attach them to the ends of balloons. We asked Harmon's Grocery Store to attach fish wire to the ends of the balloons instead of the regular ribbon. This way, it was transparent and appeared as if the snowflakes were floating.  It was so cool! We hung the balloons and snowflakes over the prizes they were giving away for the raffle, so it made it even more special.


For these trees, we used actual trees we found at a park!
We used white and silver spray paint to fully coat them, making them look like a Winter Wonderland... Literally!


Here are some more pictures of the entire party:


Thanks for reading! 

Monday, December 2, 2013

Winter Lips

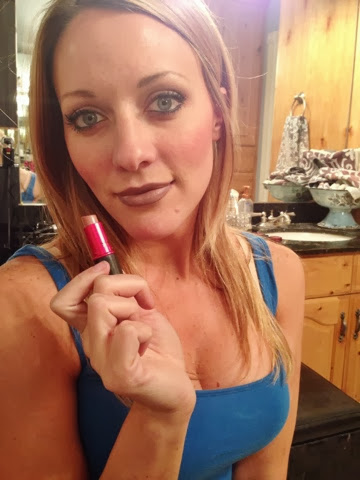
Winter is officially upon us and it's time for holiday parties! With so many events happening, we know it is hard to take much time to get ready... so we would like to suggest using LIPSTICK as a fabulous tool to help you look festive in the blink of an eye!

Here are some tips and lipstick ideas to help you out. 

We prepped our lips with fresh - Sugar Lip Polish to help get dead skin off and moisturize our lips. It's made with sugar so it's tasty too :)


If you are going for a more glam look.....

Use an Estée Lauder pencil in Plum Writer (discontinued) to outline your lips.  This is a burgundy hue so any nice red/purple will do.  


Fill in lips completely with the liner.


Using MAC - Viva Glam II lipstick... (a gorgeous tan color... perfect for winter and holidays!)


Apply all over the lips, covering the liner.  The purple mixed with the tan creates a stunning look, dramatic but not harsh.


To finish off the look, Angela used MAC Dazzleglass in Phiff! It's part of their holiday Nocturnals Lip Gloss: Nude box set.


And here you have a beautiful Mauve Holiday lip... We can guarantee that you won't see this one much, so try it out!


If you are going for a more poppy look....

Outline your lips with MAC - Magenta lip liner


Don't completely fill in the lips... Just shad the corners and blend.


Marianne chose her favorite color right now MAC - Candy Yum-Yum


Apply the lipstick all over


Then go back with the lip pencil and define the edges to give it a solid line.  This helps prevent the lip color from bleeding.


She likes to pull her lips in to make sure the peaks are even and symmetrical.


It's a fun bold lip wearable for any occasion!


We hope you got some good ideas from this!  Go outside the typical Holiday red's and try these fun, different colors for the holidays!

Let us know how it goes!

Angela & Marianne