Friday, December 28, 2012

feeling Lippy...


"People will stare.  Make it worth their while."  
-Harry Winston


I saw Angela today and she was looking awfully drab, so I told her she needed to do something about it.  But after looking in the mirror, I realized I looked washed out as well!  So... we decided to fix it with lipstick! Here are three different looks we made to cure winter's "washed out" curse.  Thank you to our sister Allison for helping us out on this one!

To start out, all of us used a powder foundation around the edges of our mouths.  This is really important because it's like primer for the lipstick, and lipstick will look better when it is set against a smooth, even skin color.  We brought the concealer onto our lips as well so we had a clean slate to work with. You can use any concealer or foundation you have.


Marianne had the most simple of the looks. She used a MAC lip pencil in HIP 'N' HAPPY to line the edges of her entire lip. She brought the liner towards the center (from the corners) to fill in and create dimension but left the center open. Marianne then applied a matte MAC lipstick called SNOB (see it here).  Ang and Al thought the name was very fitting... she obviously disagreed haha. To blend the lipstick and liner, she used the lip pencil again, cleaning up all of the edges.


When we showed Allison her colors she said, "WHOA! Remember that I have freckles?"  That is exactly why we chose a MAC lip pencil in REDD and LADY DANGER lipstick. Using the same technique we did with Marianne, we lined the entire lip then brought it toward the center from the corners. This not only gives your lip dimension but helps the lipstick from bleeding.  It also keeps the corners clean so you don't look like a clown! ;) We then filled the lip in with LADY DANGER (see it here) being careful not to take it out to the corner because that's when it can come out of your lip line (while you eat or talk or kiss?) and smear a.k.a. Clown. LADY DANGER is a bright orange so layering this over the REDD made a fantastic shade and looked great on her complexion. After applying the lipstick we used the lip pencil to blend and clean the edges up.


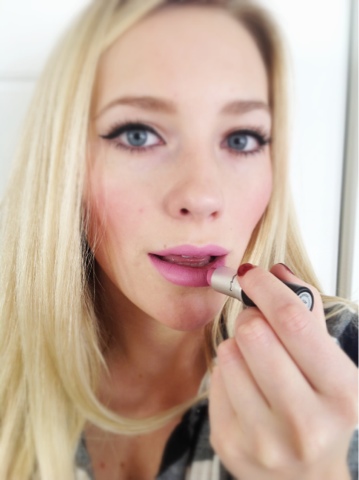
Angela's look was the most complex but our favorite! We used two lip pencils. The first was KYROLAN in K14 and lined the lips then shaded just a little bit. We then used MAC HALF-RED to shade more of the lip and create a smooth transition between liners and lip. The lipstick we used is MAKE UP FOREVER in MULIN ROUGE (see it here!). It is a deep red with a beautiful satin finish that we absolutely love! To get a clean line around the edges we used a lip brush with a little lipstick.  We went over the outer corners and edges again with HALF-RED to blend the colors more so the lips have beautiful dimension and shape.  *Notice how we used purple liners but red lipstick, don't be afraid to layer and mix colors, as long as they are close to the same family!  Creating your own lip colors is super satisfying!  **Using a lip brush is ideal for beginners because it gives you more control over your boldness and thickness of the lipstick.  It's a handy tool!


A FEW TIPS FOR BOLD LIPS:

  • Make sure that you sharpen all pencils before you start this look.  It is crucial that your lines are straight and clean, and that stems from the point you are using.  The messy look definitely doesn't fly with bold lips.

  • During these dry winter months make sure you are applying chap stick at night before bed.  It is also good to put it on during the day, but between eating and talking it doesn't do the job it needs to.  It's hard to keep smooth lips in the winter but that will help make a bold lip fly.

  • Before we ever go public with our bold lips, we like to "blot" with a tissue to get the excess color away from the teeth.  No one wants red teeth... Yikes!

  • A BOLD lip works great with minimal eye makeup, so if you're ever in a hurry, just do the lipstick thing!  It will still look like you took the time and effort to get dolled up, but in reality you took 5 minutes to conceal, pencil, and lipstick your lips!  It's a great trick!

  • The key is CONFIDENCE.  Girls always say, "I could never wear that color", but the truth is, you can wear anything you want to!  As long as you put it on with the right technique and KNOW it looks good!  Take risks and ROCK THEM!


We hope you could get some ideas from this post, it was a fun one!  Thanks for reading!


~Angela, Marianne, and Allison


Thursday, December 27, 2012

Front French Braid Video Tutorial

Here is a tutorial we made of the front french braid in our previous post.  Hopefully it helps some of you, and remember... Practice makes perfect!  It will take a few times to get it just the way you want it!


~Angela and Marianne

Wednesday, December 26, 2012

Front Braid to Sock Bun

We hope you all had a very Merry Christmas and are enjoying the holidays!  We love this time of year, it really is the perfect season to try new looks!

Today we are going to mix it up and show you guys one of our favorite hair styles.  We are putting two trends together: the front braid and the the sock bun.  They compliment each other extremely well and it's a classic look.

First, we determined what kind of french braid we wanted.  Angela likes a thicker, loose braid, so we parted her hair a little further over than she usually does and picked up about a 3-inch wide and 1-inch thick section of hair and started an outside french braid. 


We continued the braid down the front but stopped the french style at the ear and finished a normal braid all the way to the end.  We fastened the braid with a small rubber band on the end and set aside.


Next, we "ratted" (or teased, some may say) the crown of her hair to get a little height.  For those of you scared of the rat-tail comb, don't be!  A little teasing of the hair can make such a difference to the face and hairstyle.  We then put the rest of her hair (not the braided piece) into a ponytail and got our nifty sock bun accessory!  You can use a regular sock by cutting the toe off and rolling it up, or you can get one of these doughnuts from any hair supply store, which we used:


We pulled the ponytail through the hole so all of the hair except the braid was in the sock or doughnut hole, bringing the doughnut/sock down towards the ends of her hair stopping before it fell out. Most of the time our hair is layered when we pull it back for a ponytail so be sure to watch for the shorter hair and not to go too far. Angela had about a 3 inch tail.  We tucked the remaining hair around the doughnut/sock so it was evenly spread around. I didn't do this step very well and that is why the bun isn't perfectly symmetrical. I don't think it's a huge deal though, it just adds character :) 


Then, we started to roll the doughnut/sock up towards her head. If the hair around the doughnut/sock starts to become loose or fall out, just pull the doughnut/sock down a little bit (don't unroll, just pull) to make the hair tighter or tuck the hair in.  We finished the roll so it was close and tight to Angela's head. If needed, secure the edges with a few bobby pins. I always secure it because it's better to be safe than sorry! :)


We took the braid and wrapped it under then around the bun so it was pulled tightly. If your braid is not long enough to reach all the way around just tuck it into or under the bun.  We secured all around the bun with bobby pins. Be sure to tuck the little elastic and hair ends in so they are not visible.


We then pulled the hair at the top of her crown and on the side just a little to give it more height and imperfection. You can also tug on the braided sections a little to loosen it up if it's too tight and make it more messy.


We finished with hairspray and VOILA! Who knew you could make a braid and a bun so stylish?!  Have fun with the placement of the bun or by adding a braid, twist, barrette, headband, etc.  This only took us about 10 minutes. 


 ~Angela and  Marianne

Sunday, December 23, 2012

Look of the Day: Luscious Lips


Instead of just playing up your eyes, try to mix things up and let your LIPS be the focal point. 
Right now I am really liking the deep wine and berry colors but if that's too much for you go with a more neutral tone. Although why not step out of the box and try something new?!
I used MAC: Half-Red lip pencil - Line around edges and bring it in from the corners just a bit to give dimension and Viva Glam IV lipstick - It's a frost finish so that is what gives it that shine.
Be sure to use a lip pencil so the lipstick wont bleed.
Good luck and let me know how it goes!
~MARIANNE

Friday, December 21, 2012

Look of the Day: Purple Meets Blue

Today, purple meets blue. 


To begin, I put on pretty much every purple eyeshadow I own to create this color that is on my lid.  I usually wear shimmer finishes on my eyes, but today it turned out matte, and I totally loved it!  I put a bunch of dark purples on first, and then some brighter purples on top, and it created this cool shade of medium bright purple! It was a fun look to say the least.


Then, I used my go-to BLACK "Carbon" from Mac for the outer edge.  I think that has become another one of my makeup collection staples.  It's the perfect, non-sparkle black.  I did a TON of blending to make sure it didn't look too "goth".  (Although, I do love the goth look!) I love how you can see that there are so many different colors being used here.  That way you can never really re-create the same look, which keeps it original-- I'm all about that!


Next, I used my trusty Urban Decay 24/7 Glide On Eyeliners and put "Zero" on top, taking the end just a tad bit past my eye.  Then decided to throw myself for a loop and put "Deviant" on bottom.  If you can't tell, "Deviant" is blue.  I went across the entire water line and underneath the lash line, as well.  I love using two accent colors in the same look.  It's so unexpected, and makes people look twice to make sure it really is a different color on bottom!


I finished the eyes off with some Clinique High Impact Mascara in Black.  I went for a very nude lip since the eyes are so extreme, mixing Mac's "Honey Love" and "Angel".

If this post teaches you one thing, this is it:  Don't be afraid to MIX your makeup colors!  It opens up a whole new world of color and options!  And it makes your creativity limitless! 

Hope you guys enjoyed this look, it was a fun one!

--Angela

Thursday, December 20, 2012

5 Products That Will Change Your Hair's Life

Unfortunately, I was not blessed with strong hair and I have a bad habit of damaging my precious locks.  The dry Utah weather doesn't help it, either.  I have spent the last few years searching for products that will make up for that.  So, for all of you out there who have tried the biotin, prenatal vitamins, and endless leave-in conditioners, today I am going to show you the top five products I have found that have changed my hair's texture, length, and overall well-being entirely. 

#1: One 'N Only Argan Oil 

Moroccan Argan Oil became quite trendy over the last few years, but I never wanted to try it because my hair is already naturally oily.  I went into Sally's last March and they had just received this product.  I was looking at it while I was checking out and the cashier gave me her little sales pitch.  The price wasn't bad so I decided to give it a try.  I was careful to only use it on the bottom half of my hair so that I wouldn't look like a grease ball everyday, applying it after I washed and conditioned my hair, kind of when it was in that damp state.  Now, I can't (I think this is a mental block so maybe I should say "won't") even begin to comb out my wet hair until I have applied this oil!  It acts as a detangler AND strengthener, which I totally need.  I have also started to put it up around my hairline to help those strands that get damaged and break off more.  I am sure any Argan Oil will work, this is just the specific brand I use.


#2: Fekkai Advanced Brilliant Glossing Shampoo

This is what I like to call the pro-shine, non-frizz, de-tangler, healthy shampoo.  What an amazing product.  I got this small sample when I was shopping in September and it has made a huge difference in the dryness and frizz of my hair.  It is hard for me to keep a good shine during the winter, and usually I rely on conditioners to protect my hair, but this shampoo is well worth the money.  The olive oil mixed with the shampoo formula is brilliant.


#3:  It's a 10 Miracle Hair Mask

For those of you who just need an entire re-vamp of the hair, this product is for you.  I feel scared for my hair's well-being when I run out of this product.  It is a little pricey, but it is so worth it, and it can last a long time.  When I first starting using this, I would do weekly over-nighters with it on.  After I shampooed my hair, Marianne and I would slather this all over my hair and I would sleep in it with a bag around my head.  Those were some long nights, but well worth getting rid of my "chemical cut"!!  It stopped breakage and put the "soft" touch back into my hair's texture.  Now that my hair is doing better, I like to use it as regular conditioner once a week.  This is probably my number 1 recommended hair product.  It changed my hair's life!


#4:  No Drought Dry Shampoo by LUSH

If you are trying to save your hair, DON'T WASH IT EVERYDAY!!! I know that can drive some of us nuts, though, because we can SEE when we don't wash our hair.  I think dry shampoo is one of the best inventions ever.  I was using a spray dry shampoo, but I found that it coated my hair and made it look like I used too much product, so I switched to this powder just two weeks ago and I am really loving it so far.  The spray is definitely more convenient (and less messy), and may work for some of you, but for those of you looking for a powder, this one smells great, too!  Not to mention, it is made from all natural products, yay for being green!


#5: BioSil

This is the only product on this list that you use orally, but this product, alone, is enough.  I was looking for biotin at Whole Foods last spring and the girl told me if I was looking to help my hair I had to try this, it was the best.  She was right.  My hair sprouted and grew like a weed, and became thicker over night (okay not really but you know what I mean).  I'm a believer.  I have to say it tastes pretty bad, though, so I try to mix it with Diet Coke or juice. 


*One more tip: SOFT WATER makes such a difference in my hair.  Never realized it until I didn't have it.  If you have hard water, try getting a filter or something, it is totally worth it!


So here it is, the list of 5 products my hair can't live without!  I know that some of these products are pricey, but I have tried a majority of the drugstore products and they just didn't work.  My hair was in such bad condition that it was worth it for me to splurge on these.  Hope you guys try some of them, and let me know what you think!!!

--Angela

Wednesday, December 19, 2012

Mommy Makeover

Today's post turned out absolutely gorgeous, and I have to credit a lot of that to my beautiful sister, Allison, for being my little model!  She has always been one to get dressed up and take care of herself, but after having a baby five months ago, she kind of "lost her way" (lol) and she will be the first to admit that!  One thing she expressed to Marianne and I was that it was hard to feel pretty.  Between changing diapers, doing laundry, being extremely swollen right before and after the birth, and her skin going through major changes, getting herself together wasn't an option.

Today, I want to focus on moms or just people in general who don't have a lot of time, but would still like to have an IMPACT look. For example, a Christmas party, where Allison was headed.  The best part about this look is it only took about 30 minutes.  We didn't have a lot of time, so we focused on her best asset, her eyes.  I also contoured her face to help define her cheeks which made her appear slimmer, and gave her a nude lip so the focus stayed up top.  I love this look!!!


Products Used:
Makeup Forever DUO MAT pressed foundation
Buxom TRUE HUE BLUSH "Shangri-La-La"
MAC Mineralize Skinfinish "Lightscapade"

MAC "All That Glitters" eyeshadow
MAC "Carbon" eyeshadow
Tarte Jewelry Box Holiday Pallet- the shimmery burgundy color that is nameless!
Urban Decay 24/7 Glide On Eye Pencil "Empire"
Clinique High Impact Mascara "Black"
MAC "Creme d' Nude" lipstick


This is Allison fresh-faced, still beautiful!  Always start with a clean, moisturized face.  Make sure you clean all black from under the eyes.  So important.  To start, I gave her an all-over sweep of the Makeup Forever pressed foundation, she only needed light coverage.  For those of you that want a little more, just keep applying and it will build upon itself.


I then applied the Buxom blush.  I am completely in love with this product.  It is DARK AND POTENT so you don't need much!  When applying blush, you can do it a few different ways, but I chose to sweep it ON her cheekbone so her face would appear more defined, taking it all the way up to the hairline.


I then applied "All That Glitters" all over her eyelid, all the way up to her brow.  This color is a fabulous everyday color, and has a little shimmer in it, which I love.  I then got my nameless burgundy color (haha, any accent color will do here, I like burgundy on blue eyes) and blended from the outer corner around the outside of her eye.  Think of starting at the end of the lash line and curving up into the crease in a "C" shape.  (If I want a more dramatic look, I could take it all the way in on the crease.)  I then got "Carbon" and added just a small amount to the middle of my "C" to add dimension.  Black can be a scary makeup color, but the key to making it work with this look is BLENDING.


Next step is the eyeliner.  Urban Decay Glide On is really great because it goes on SUPER easy, as the name implies!  I didn't do a wing, I just simply lined the upper lash line, water line, and went halfway underneath the lower lash line.  I love the purple on Allison!  We curled her lashes, and then applied the Clinique mascara on top and bottom.


Now it is time for the finishing touches!  I used a lighter shade of nude lipstick, which looks better with Allison's skin tone.  She didn't like the nude lip at first, but I told her she HAD to wear it to get used to it.  It is definitely a different look, but it is very classy, and, not to mention, trendy!  I then got my illuminator by MAC called "Lightscapade", which has changed my life!  This is basically one of my makeup staples now.  I use it on EVERY look.  You only need a little bit, otherwise you will look too shiny, but it gives quality and the "wow" factor to each look.  I put a small amount on a face brush and swept it down the middle of Allison's face, starting between the eyebrows, down the nose, on top of the lip, and a small dab on the chin.  I also swept it under her eyes, in an "up" motion, parallel to her blush.  It gives a glow to the face that you can't get any other way!


I know it seems like a lot of steps and products, but as your makeup collection grows and you learn how to use your products, you will become more confident and work faster.  Thanks, Allison, for letting me get you pretty today!

--ANGELA